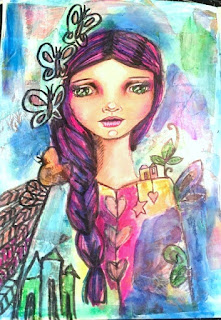
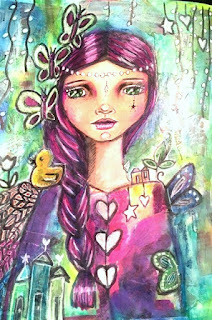
These Hey Girl memes crack me up...even though I know they're not new. I used it for the post title because for this week's installment of our long-distance art journaling, my sister, Julie, and I created Girl Portraits from the Tamara LaPorte book, Create Your Life.
I've previously taken a Lifebook course with Tamara (online) and learned step-by-step how to create a whimsical girl portrait. In the book, you get the info but it's not nearly as comprehensive or helpful as the video for people like me. However, if you can't take the online course, the book is a fun way to learn how to art journal from a variety of artists. I do recommend it.
I took some photos along the way so you could see. First, of course, is the sketch. The next is water-soluble crayon. I used
Gelatos with water and then painted it on like watercolors. This second step is where I panic a little, all the sketching seems lost and she is very flat-looking.
The next step was adding watecolor pencils and adding back in the details lost with the first layer of paint. I'm still not happy with her at this stage, but I forged on. The fourth step was to add in acrylic paints. You'll notice I changed the eye color for no real reason, and I added in pinks and purples in the shadows just like the example. I was a little afraid to use the stark white in the middle of her face, nose and around her lips. But it does add dimension and there's still a lot of painting to do. So I kept going as instructed.
For the 5th step, you add collage papers to the background and then scribble on with your Gelatos again. I used water and my fingers to smooth the crayon out. In the 6th step, you're supposed to brayer on some white gesso, but I didn't have those things handy, so I dry brushed some white acrylic paint to unite the background. Then I added some doodles with watercolor pencil. I'm starting to feel better about her at this step.
The 7th step includes coloring in those doodles and adding some color blocks back into the background. I used black Tombow marker to add lines to the doodles, hair and wing on the left side of the picture. For the final step, more doodles were added with black pen and white gel pen, along with highlights and shadows. I like how she turned out. In the original painting, Tamara has an owl on the girl's shoulder and I had a bird instead...but when I got towards the end, it turned out to be a duck for some reason. I get all my wisdom from rubber duckies apparently.


Whew, lots of layers, lots of media and lots of changes as I went through the process. Having taken the online class (versus just using the book) I knew that the painting would look bad at some points and that I had to just keep going. I'll admit I did tear the page some on the cheek (left as you're looking at it here) because I used too much water but I just added some dry Gelato and smoothed it the best I could. Just keep going and be okay with mistakes.
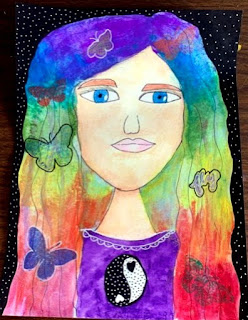
Here's Julie's process for her interpretation of the lesson.
"I outlined her with a ultrafine sharpie and then used watercolor gouache on her hair using my fingers instead of a brush. I put butterflies in her hair to represent the wings. I used different colored inks to stamp the butterflies on and outlined a couple with Posca pens. I also stamped the word fly and went over the word with a white Posca pen and outlined it with a black Posca pen.
I used watercolor pencils on her skin and even did some shading which was a little scary for me since I’m not used to doing that. I kept adding a layer after one dried until I got the right shading I liked. I also used watercolor pencils on her eyes, lips, eyebrows, and eyelashes. I used watercolor gouache on her shirt as well. I added details to her Yin Yang with my Posca pens. I wasn’t real happy with the background so I painted it with black acrylic paint and then added white Posca pen dots. I’m really happy with the way it turned out."

Of course, Julie did more of the thinking part of this art lesson, I tend to skim that part (choosing which symbols you want and what they represent to you, thinking of your childhood, figuring out what things still have weight in your life, etc.) and go generic but Julie does some of the work behind the lesson, which is cool. I love the hair here and her background absolutely makes the image pop. It's interesting that we both had moments where we were nervous about adding things and then both ended up pleased with the final results.
I love trying new things in the arts and crafts world, even though some I ought to stay far away from...like the needle felting I tried. Those needles are flippin' sharp!
What materials have you tried recently?
Happy Friday!
Chark


Thanks for sharing this fun post! I so enjoy seeing your coloring process!!
ReplyDeleteAppreciate you stopping by, Cindy!
Delete